Saturday, July 2, 2022

Improving the Lab Experience for Students AND Teachers


Labs! The best and worst thing about being a science teacher at any level.
Lab Truths

Truth #1 -- Students love labs. They love having a class period where they get out of their seats and actually get to experience science.

Truth #2 -- Many students do not actually learn anything from labs. Of course, some students do, but many students are so busy following directions (or not following directions, in some cases!) that they don't actually think about what they are doing or why they are doing it.

Truth #3 -- Labs are very time consuming for the teacher, including preparation, set-up, material collection, and clean-up. (Even more so if it's a lab you haven't done before so you need to run through it first.)

These poor chemistry students
following step-by-step directions
might as well have blindfolds on.
As a science teacher, I am okay with #3, if it provides a learning opportunity for my students. One of my pet peeves is taking the time to plan a good lab that correlates with what we're learning in class, only to have students blindly follow directions and not be able to talk intelligently about what we've done.

I have had a principal walk in during a lab on boiling point elevation, and ask a student who is boiling water, "What are you doing?" The student answered, "Boiling water." The principal continued... "Why?"  Student: "Because it says to right here." Major teacher facepalm moment. Did we go over the purpose of this lab beforehand?  Of course.  Did it correlate directly to the content we'd been working on for weeks?  Of course. Did any of that matter once the student blindly started reading a list of directions? No.


Labs, with goofy
teenagers, can be a stressful
time for teachers.
Truth #4 -- Labs are stressful class periods. Watching a class of 24+ students, trying to make sure everyone is doing what they need to be doing, and following safety rules, is incredibly exhausting. Trying to make sure students can finish (and clean up) in a 45 minute class period makes for a very stressful day. Then comes the inevitable questions, most of which can be answered by "Read the directions." And of course many of the questions that they ask show that the students are not actually thinking through what they're doing.

I have tried to tackle the issue of labs in many different ways throughout the past 20 years. I know labs can be very valuable, and I know students enjoy them. I know labs are an important part of science instruction. If students know all the answers but don't understand how to answer a question in the lab, they really don't understand science.  I have tried pre- and post- lab quizzes. I have walked students through the entire procedure the day before. And yet, somehow, lab days are always so stressful.

This has been slightly improved by having students write their own lab procedures, but that doesn't work for every lab. In a chemistry classroom, there are many situations where it just doesn't work (practically or timewise) for students to write their own labs.  They just don't know enough to know all the little details about how these labs work, which is why they're in the class to begin with!

What Wasn't Really Working

In the past when I have introduced students to calorimetry, we do a few math problems and then I give them a lab in which they follow the procedure to find the specific heat of an unknown metal.

Inevitably, students are on autopilot following cookbook-style directions without thinking about how this directly relates to what we've learned. They don't look ahead to further steps, or the final goal of the lab, and simply take it one step at a time. It's as if they're reading a story one sentence at a time, without thinking about the overall plot of the story.

Students boiling water for chemistry lab.
Do they ALL know exactly WHY
they are doing this?
For example, the directions say "boil about 250 mL of water." They don't think through questions about the procedure. Critical thinking should cause students to consider: "Should I measure the water exactly or is an estimation okay?"

Depending on the purpose of the lab, sometimes it needs to be exact, and sometimes it can be estimated. They should think: "Does it have to be exactly boiling or is getting it pretty hot and recording the temperature okay?"

Again, this depends on the lab. These are all questions that we as science teachers want our students to think about and make decisions about, but again, once they get in the lab, the thinking stops, and they just follow directions.


Until... I Had An Epiphany!

I realized that my goal in a lab was for students to be able to improve upon and use their reasoning abilities to answer a guiding question that directly relates to the subject matter we learned in class. As mentioned previously, this wasn't working because students (even very strong students) were being TOO "guided" with the lab packet of directions.

It was like using step-by-step GPS navigation on a long road trip- upon arrival of your destination, you got there, but you don't know HOW you got there. As a teacher though, I want my "drivers" to know EXACTLY how they "got" there.

So, I approached the next lab much differently.

This time, as I introduced calorimetry, I didn't send them directly to the lab.  First we talked about the purpose of calorimetry and how it would be used to find the specific heat of an unknown metal. I talked about the procedure conceptually, guiding the students through major ideas.

I then put them in groups to summarize the procedure we talked about. I then told them that in a week, they'd be doing this lab themselves, but they would not receive any directions. 

The next day we solved more calorimetry math problems. As an opening question, we discussed some conceptual ideas about the lab.

For the next week, as we continued to dive into different topics in thermochemistry, we started each day with an opening question that mentioned the lab.
Why do we do such and such?
What happens when you do such and such?
What would happen if we did such and such on accident?
Why is doing such and such this way important?

The day before the lab I showed them the lab set up and pointed out a few small details they would want to pay attention to. I asked them if they had any questions, and a few students did.
They were actually thinking ahead of time about the lab. 
As they asked questions, I asked their classmates to think about how they would answer, and we had great class discussions, as students thought about the purpose of the lab, the final goal, and how they would get there. 
I tried not to answer their questions, but guide their classmates to answer their questions.
This was DIRECTLY relating the content to the lab experience, and getting them to think critically about it.
Students executing lab procedures
from their own notes from class 
and helping each other in the
process.

Lab day

The students walked in, found their randomly assigned partner, and started to attempt to answer the question - What is the specific heat of this metal?
I did not give them any lab directions at all. It was the calmest, least hectic lab day I have ever had (and did I mention it fell on the day before spring break?).
Students got the best results I've ever had on this lab. I heard them asking each other questions (but none to me!).


I heard them talking through the procedure with each other - reminding each other what they were doing. And as a teacher, it was amazing to watch. Student after student, group after group, class after class -- they were all performing an experiment to answer a question.

Now We Were Getting Somewhere

They were now APPLYING what they had learned in class- NOT blindly following a procedure of just being dependent on provided step-by-step directions. This was real science!

With previous labs students got caught up in the wording of the procedure. They read step 1 and focused on that, without looking ahead to what step 2 is. They had trouble finishing the labs on time because they went through each step, methodically, along with their lab partner instead of splitting up the work. Even though steps are separated -- step 1 and then step 2 -- sometimes those steps can be completed simultaneously, to save time. But to know if that's possible, students need to understand the lab at a deeper level than simply following directions. They followed steps without understanding why they were doing it.  By taking away the "autopilot step-by-step GPS navigation system", the lab directions packet, I was able to observe students working together to successfully answer a guiding question, completely on their own.

Students discussing lab results.
I could tell from their discussions among each other that they were getting it. One group noticed that their water temperature was going down after they put the hot metal in. They knew this should not happen. So they started over again, without checking with me to see what to do.

A few units later, I did the same thing with the acid-base titration lab.  In the lessons leading up to the lab, we not only went through the concept of titration, but the specific lab steps, and why each step was important, and possible errors that could happen. Again, lab day was so much simpler without a lab procedure.

This obviously will not work for every lab. And it takes a lot of planning ahead to be able to prepare students for a lab for a week. And yes, it is important for students to learn how to follow a procedure in the lab. I encourage you to try this for a lab that it will work well with - a lab that will integrate seamlessly into your content for that topic.

Alternate Method

For other labs, I have tried a second method that is a little less time consuming.

For this one, instead of just having students read the lab the day before, we do a little "Reader's Theatre" and model the lab procedure.

I give every student a copy of the procedure and have them read it out loud with a partner. Reading it out loud gives them a little better concentration than silent reading does.

I then randomly choose two students to come to the front to "model" it.

I have a basket with all of the lab equipment they will need.  Student A reads the procedure, one step at a time.  Student B models the use of the equipment, without actually measuring anything or using any consumables.

When something doesn't quite look right, I stop them, and have the class give hints.  For example, one of the steps involved filtering a substance through a funnel.  Student B put the filter paper in the funnel and then modeled pouring the liquid into the funnel.
I stopped and asked the class -- "Uh oh, what's wrong here?"  A few noticed - the imaginary liquid is going through the funnel and pouring all over the floor.  So we knew to put a beaker underneath the funnel, even though the directions did not explicitly state this.

My goal is for students to read a procedure and understand what to do.  When I tell them just to read it, they read it and see the words, but still go into the lab dazed and confused. 😵
Reader's Theatre obviously takes a lot of class time. When I model "practicing" the lab, they learn that they can do that at home. When reading a lab later in the year, they can go through the motions, instead of simply reading it, and then they know what questions to ask before lab and what directions were not clear for them.

After a few labs of "Reader's Theatre" you can ask students to do the same with a partner or at home, which really improves their understanding of procedure BEFORE coming to lab.

Lab Reports

Finally, let's talk about lab reports. Lab reports can be a pain to grade, especially when students do not understand exactly how to do them. However, the process of writing about a lab is a very important skill for science students to learn.

6 Scaffolding Strategies
to Use with Your Students: Edutopia
Scaffolding is a great way to prepare students for higher level thinking skills in every subject. I recommend scaffolding the skills for a lab report, depending on your student's abilities and their previous experiences with lab write-ups.
For the first semester, instead of requiring a full-length lab report, I scaffold skills so students get feedback on each part, on one skill at a time.

For the first lab, I grade just their procedure and give them detailed feedback.

For another lab, I grade just their data collection and analysis and give them detailed feedback on that.

For the next lab, I grade just their error analysis and give them detailed feedback.

For each part, I give instruction and a rubric just for that part, and allow them to really focus their efforts on that. It also allows me to give much more detailed, helpful feedback, as I am just looking at a small piece of the lab report. After students get my feedback on each part during the first semester they are ready to write a full lab report by the start of the second semester, and the results are ALWAYS better than throwing them out to sink or swim.

The Takeaway

We all know that labs are crucial to science education. But more than just doing labs, it's so important that labs be an integral part of the science class, relating back to the content that we need them to learn, and helping them learn that content better. This take a lot of extra preparation, but can really reduce your stress in the long run.

Happy Labbing!

Wednesday, May 5, 2021

End of Year Survival Mode - Get Your “Game” Faces On

Let’s face it folks, it has been a hard and challenging year for teachers and students everywhere. (Yes, I know, this is an understatement!)

Whether you have been hybrid, in-person, online, or a combination of everything, it has been rough. We know that students need to continue to learn and be engaged, but we also know that we are all tired, more tired now than ever before.

Here are some ways that I’ve found to keep students engaged (both online and in school).


Let me be honest, I have never really been a fan of Kahoot, probably because the first class I tried it with barely read the questions before choosing answers and it felt like a colossal waste of time. 


However, I have rediscovered Kahoot this year and have found it to be a sanity lifesaver.


Kahoot Idea 1 - Homework Check


I have never been a fan of grading homework, as I have mentioned in previous posts. However, this year I am teaching ninth graders for the first time in many years, and it is really hard for them to buy into the mindset of “if you do the work, you’ll do better on tests.” So for a while I was collecting every class work and homework assignment. Which brought me to this first Kahoot idea - make a short Kahoot to start the class, using questions, (either the same or very similar to), the homework.


Ninth graders may not understand doing homework to understand material for a test, but they sure do understand doing homework to win a Kahoot! 


This is a quick and easy way to keep them accountable, and also an active way to get them involved in class (and for me to pick up easily on misconceptions that they are having WITHOUT having to grade homework!).


Kahoot Idea 2 - Student-Made


When students play a Kahoot, they either know the material or they don’t, but for students who are weaker or who haven’t been paying attention in class, sometimes it’s somewhat wasted practice. 

One way that I have found to really get them to focus more is to create their own Kahoots. I have done this with English Language Learners as well as on-level students, and as long as you give very specific expectations, I have had great success. Students love it, and then they love playing each other’s Kahoots. 

For a tired teacher, this can be two days worth of lessons -- one to create and one to play!  Win win win!


For lower level, or ELL students, I have them create Kahoots directly using the worksheets they’ve been given. Just choosing “wrong” answers as choices and re-writing the questions from the worksheets is great repetition for them to review the content.


For on-level students, encourage them to write their own questions.  


For both types of students, set up the expectations: 

How many questions should they have? (Usually ten is good.)

No “wasted” questions - “Did you love this Kahoot?” doesn’t count as a question!  


Tell them what material to cover (for a test review over a unit that had two sets of notes, for example, you may say, five questions from the first set of notes and five from the second).


Try telling them to include pictures - maybe 3 of the 10 questions must include a picture from the internet, (I have to remind them that the picture must support the question!).


Games Games Games!


If you have a final exam, or just want students to review what they have learned this year, there is no better way to get them to review a year's worth of topics than to get them to review with games!


You could set up stations, with a different topic at each station, and have students rotate. Or, you could have several of each game available for students to pick the ones they want to play each day.


The key to keeping students engaged with games for more than one class period is to have a VARIETY of games.

Adding games like board games and card games can be the BIG solution to keeping students engaged when they are getting bored of simple question/answer Kahoot or quiz show type games). 

Games where they’re studying/playing in pairs instead of as a whole class prevent them from feeling free to zone out into the crowd like they would during a whole class activity. And the one-on-one game format will bring out the competitiveness of even the most reluctant student!  


 All Chem Games Bundle
If you are in person, I have games for almost every topic in Chemistry - get them all with my new SUPER DELUXE GAME BUNDLE: 


or just mix and match individually from the topics you’ve covered, see below for a few examples.

There's no better or more fun way to end a difficult year!


Happy Gaming!


Chemistry Game
 Bundle

Tic Tac
Whack a Mole


Mole Concept
Package

Molar Mass and
Percent Composition


The Periodic Trail
Bundle

VSEPR/IMF Rummy 
Package


Monday, August 3, 2020

So You're a Brand New Chemistry Teacher... Give. Yourself. Grace.

Welcome to the Wonderful World of Chemistry Teaching! 

First, some background. Eighteen years ago, I started my teaching career as a biology teacher. As I moved from school to school, I became a general science teacher and then a chemistry teacher, and I have been teaching primarily chemistry since 2010. As I have been teaching the same course for over a decade, I have been lucky enough to be able to fine-tune my curriculum year-after-year to find ways to better present topics that students struggle with and create many new and engaging ways to teach difficult topics (or difficult students!).

As a new teacher to chemistry, it would be easy to see a classroom like mine (or that of any veteran teacher) and think -- "Yes, I am doing all that!" -- But please give yourself (and your students) a break. Any time you teach a brand new class, even if you are a veteran teacher, take a step back, and focus on the following goals for your first year. Then, if you teach the same course a second, third, or fifteenth year, you can adjust it little by little as you learn what works and doesn't work for you.*

*P.S. -- I'm trying to follow my own rules this year! I'm teaching Biology for the first time in about a decade, and as I look at the curriculum, and think about all the engaging, hands-on lessons I've developed for Chemistry, it's easy to think -- "I want my Biology class to look just like my Chemistry class."  I have to remind myself to start from the beginning and give myself grace.

First Year Chemistry Teacher Goals

Curriculum and Course Outline

This differs greatly from school to school and district to district, so I can't give you specific advice. However, it is important to immediately find out from your school what the expected curriculum is.  What standards are you supposed to cover? It is hard to fit any Chemistry curriculum into a one year course, so you may have to forgo some of your "favorite" topics or activities the first year just to get through the material. Some districts absolutely require you to finish the curriculum (if you have a state end of course test, for example) and some districts are more lenient on this. Find out what you need to cover and how long you have to cover it. Get out a school calendar and mark off holidays, and then divide the remaining time between the units that you have. Some schools will already have this done for you in a curriculum map, and some schools will have you start from scratch. As a first year teacher, it will be hard for you to know what topics will need what amount of time, so make your best guess, and if you need to adjust it next year, you can.

Potential Pitfall

If your school does not have an end of year test, or any real accountability for you to finish the curriculum, it is very tempting (I have been there!) to add in a lot of fun activities and projects and go very slowly through the actual curriculum (and not finish much of it at all). Please try to avoid doing this. If your students change schools mid-year, or decide to take higher level Chemistry classes in the future, it is really important that Chemistry on their transcript indicates their actual mastery of chemistry concepts.

Rule of thumb: With very few exceptions, students will learn the material with the same proficiency, no matter how much time you give them. My first few years teaching Chemistry I didn't plan out my units, and just taught each topic until I felt they were ready for a test. Rookie mistake! Some topics seemed to drag on and on.  I could spend 2 weeks on naming ionic and covalent compounds and some students would still fail the test. I always thought, "If I just spent longer on this topic, would they have done better?"

Now that I plan my units, my students know from the very first day of a unit when the test will be, and from the very first day of a new topic when the quiz will be. It is up to them to learn it in that amount of time. The same students who fail a quiz after 2-3 days of instruction on naming ionic and covalent compounds will still fail it after 2 weeks of instruction on the same topic. Of course, I am generalizing, but except for extenuating circumstances and learning disabilities, I have found this to be true. Students will wait to put in the effort to really learn something until they need to. If they know that you will keep giving them time to practice as long as they are struggling, they will continue to struggle!  If they know that you will move on after a set number of days, they will spend class time a lot more efficiently to figure it out.

So, use the calendar and set up your units for the entire year. This is an overwhelming task at first, so first just divide up your year into units (equal time per unit -- you can adjust this next year after you've seen how it goes). Then, try to outline one or two units to get started. For most topics, plan for about 1 day of instruction and 1 day of practice (and then at least 1 day at the end of a unit for review and perhaps 1 day for a lab or other hands-on activity). If you can, put in at least 1 "extra" day per unit -- a built in "snow day" - that you can use for extra instruction, or a "lazy" day for you (more on this later in this post).

Try to keep to this schedule throughout the year, even if you know students are struggling. If they are truly struggling, take out a planned activity or lab day and use it for more reinforcement, or change the way you present the material, but really try not to extend units, or you will not finish the curriculum.  Keep track throughout the year how this schedule works for you -- which topics went faster than expected, and which topics could have used more time -- and then you can adjust for year 2.

Content

The absolute most important thing for a chemistry teacher is to Know. Your. Content. Whether you majored in chemistry in college or are stuck teaching a class you were never prepared for, take the time to look over the notes, book, and any other resources before each class and make sure you are comfortable with the content for that day. If you're not comfortable yet -- watch extra videos, ask questions in teacher Facebook groups (if you're not a member, join them!), and do whatever it takes to build up your confidence in that topic. Teaching chemistry to high schoolers is nothing like simply understanding chemistry yourself. It takes practice and experience to understand how they think and the misconceptions they will have that never occurred to you (a post on this coming soon!). Yes, students love fun activities and hands-on labs. But even more, they like being able to understand a topic. There is nothing worse than looking at a group of totally lost teenage faces, realizing they don't quite understand what you're saying, and having no idea how else to explain it to them. There is nothing better than seeing the spark in a student's eyes as they actually understand what they are learning. Sometimes you have to go home, re-think through the lesson, and try again the next day. Sometimes you just have to repeat what you were saying, but with a different example or different slideshow. But there is no point in taking the time to plan amazing activities if the students just don't get the content. So year 1, spend your time making sure you're comfortable with the content each day, and if you can come up with a few fun activities, then great!


Avoid Resource Hoarding

If you are about to teach a new class, the first thing most people do is go to other teachers (either in person or on social media) and ask "What resources can you give me?"  I've seen teachers fall into this trap so often. They panic about not having enough resources, and then they end up with thousands of random worksheets that they will literally never use, because they will never find exactly what they need on a specific day. The only time you should collect resources is when you need a specific type of resource for a specific topic. Do a Google search, go to Teachers Pay Teachers or other websites, look through the options, and then save (or buy) just one or two that you like and think will work for your classroom. Please avoid falling into the trap of saving 50 worksheets entitled "Gas Laws." It gives you a false sense of security that you are ready for a lesson. Search for specific resources when you need them, but try not to just take a teacher's entire Google drive that's been offered to you, especially if you get the offer from multiple teachers. You will never actually find the time to look through all of the resources from all of those different teachers.  Teachers do this, especially in the month right before school starts, because they feel more prepared for class. Instead, spend your time looking through the topics you need to cover the first few weeks of school, and search specifically for a few activities for those topics, and choose just the best one from each topic to save. 

Classroom Management

You cannot teach if you are not comfortable with the content, and you cannot teach if your students are not listening. I am by no means an expert on classroom management, and the methods you use will vary greatly depending on your school, students, and your own personality. My general advice is -- make connections with students, show them you care, but also challenge them and keep the rigor high. I have had students who really struggled with the content still enjoy the class, just because they knew that I cared and would do anything in my power to help them understand and succeed.


Give Yourself Grace

No one expects your first year (or your tenth year) to be flawless. We are humans, and teachers have to make hundreds of decisions, constantly, to help all levels of students each day. You will make mistakes. You will have lessons that are far from perfect. As long as you are focusing on content, curriculum, and classroom management, you will be fine.

Give yourself grace as you are finding your teaching style.  Every teacher has a different style of teaching that works best for them. If you have taught other subjects before, you are more likely to already know what works for you. If this is your first time teaching at all, it will take you some time to learn what works best for you. Give yourself time and grace to figure this out. Try a few different ways of presenting information and see what seems to connect the best with your students. Do you like to have a hands-on activity/discrepant event/POGIL activity first, then a short class discussion, and then teach the topic?  Do you prefer to record your lessons and allow students to watch them at home (flipped learning) and then do activities in class? Do you prefer to have students read and take notes/answer questions from the book first, and then listen to your lecture with some kind of idea of what you'll be talking about?

Give yourself grace in the midst of stress. If you find yourself feeling overwhelmed and behind, take a day for a "lazy" lesson. Find a fun activity, a related video, or just a review "sub-plan" type lesson, that will give you a little bit of a break, but not give the students a "wasted" day.

Give yourself grace with labs. I know that your vision (and possibly your admin's vision, and definitely your students' visions) of a chemistry class is 

Lab! 
Explosions!
Fun!

But it is really hard to actually make lab a learning experience (post on this coming soon!). In addition, each lab takes an enormous amount of set up time from you, and during your first year, that's a lot to ask. It takes time to find the labs that will provide the best learning experiences for your students, and it takes experience for you to know the best way to present the labs. Often for brand new teachers, labs can be overwhelming, out of control, and void of actual learning. I would recommend that, depending on your circumstances, time, and lab supplies, choose one lab (or hands-on activity or demo) per unit to start with, and if throughout the year you want to try more, you can, but give yourself grace if you can't. 

Many labs in chemistry are quite dangerous and for a new teacher there can be overwhelming pressure to impress the students. Don't feel pressure to do something dangerous just because the kids want it! Stick to videos or demos until you are confident about safety! 

Give yourself grace with the content. My first year teaching AP Chemistry, I spent a lot of time teaching myself the content at the level at which I was supposed to teach. I had taught first year chemistry for a long time, but it had been many years since I had taken college chemistry, and AP Chemistry was (to put it lightly) very hard. I remember struggling with a lot of my lessons, but the worst was Buffers. My students were so confused and I ended up teaching a few things incorrectly. I went home and cried -- I felt like I was failing them. Then, through my tears, I baked brownies and watched more videos on the topic. I figured out a better way to introduce it, and went back the next day and asked my students for permission to re-teach the lesson. I apologized with homemade brownies, and taught it again. 
It showed my students that we are all human, we all make mistakes, and we can own up to them and come back from them. 
You don't have to bake for your class every time you make a small mistake, but it's definitely okay to tell them when you make a mistake, or when you don't know something and have to check on it. They will trust you more for your honesty.

The Takeaway

Take a deep breath, pull out your calendar and your curriculum, and start planning your year. Do not look at veteran teachers and aspire to be them this year, just aspire to be the most confident, prepared teacher that you can be this year

Happy Teaching!

Tuesday, October 1, 2019

Teaching Students about the Mole- Made Easy!!

Ahhh, the mole.  Ask students, "Which weighs more: a dozen pizzas or a dozen skyscrapers?" They will easily answer.  Ask students, "Which contains more items: a dozen pizzas or a dozen skyscrapers?" They will still answer easily.  Then you ask a question about the mole, and chemistry students are baffled.

The Goal

The goal in teaching the mole in a first year general chemistry course is two-fold:

First, students need enough of an understanding of what the mole is to be able to answer questions about the concept of the mole (similar to the ease with which they answer questions about the concept of a dozen).

Second, students need to be able to easily and efficiently use dimensional analysis to convert between grams, moles, and particles.  Setting the foundation well here will allow for a seamless, and much less painful, introduction to stoichiometry later in the course.

The Problems

In many years of teaching chemistry, I have noticed two main problems when teaching this unit.

First, while many students pick up on the pattern of dimensional analysis quite quickly and easily, others are completely confused by the idea of conversion factors.  I cannot count the number of times I have seen very creative, and very made up, conversion factors, like "1 atom = 58.44 mol" or "1 g = 6.02 x 10²³ atoms."  When you have spent days in class practicing, and pointing out that there are only 2 conversion factors, and that these conversion factors mean something, seeing these random conversion factors pop up on tests and quizzes can be so frustrating.

The second problem with this unit is that some students will focus all their time and energy on solving math problems, without really having any true visual about the relationship between a mole, a particle, and mass.  When I ask a simple relational question, they spend too much time trying to set up a math problem instead of using common sense.  If I ask which has greater mass: 1 atom of carbon or 1 mole of carbon, the answer should be obvious.  But too many students feel overwhelmed by the unfamiliar vocabulary and are unable to simply think logically.

The Solution

Students stay engaged and eager 
to practice when you
add competition to the lesson!
This year, I decided to try something new with this unit.  Although I teach at an international private school and have a lot of very strong students, I also have quite a few weaker students, especially in their math skills.

Every student in 10th grade takes Chemistry, no matter what math class they are in, which can lead to lots of anxiety and stress when we get to topics that are heavily math focused.
Mole concept game --
thinking through relationships 
without a calculator

I decided to make this a self-guided lesson.  I wanted students to first recognize the relationship between mass, number of items, and a quantity that is familiar to them -- the dozen.  I then wanted them to see how you can use dimensional analysis to perform conversions using those relationships.  Then, students could use those same skills to tackle the concept of the mole.

Even lower level students 
are excited to practice!

I had several worksheets available -- covering both the mole concept and mole conversion calculations.  I never collect homework - I want students to feel free to try, make mistakes, and learn from them without the stress of a failing grade - so I have the answer keys available for them to check as they go and to learn from their mistakes.


Friday, September 6, 2019

Giving Students Ownership in their Learning

As a teacher, I have some absolute least favorite, (NAILS ON CHALKBOARD!!), phrases, and among the top are:

"I did your homework."

"I studied for your test."

I always respond, "Oh thanks, but I don't have a test today."

One thing that I have worked really hard to build in my classroom is an environment in which students are required to take responsibility for their OWN learning.  The purpose for everything we do in a classroom is to allow students to learn.  But too often, students think they are doing the work "for us" instead of for themselves.

Here are some easy ways to immediately start turning your classroom into one in which the students have ownership in their learning.

Student-Owned Notes

I do this differently depending on the topic.  For topics that are very math-heavy, I have students directly copy down the examples as I write them on the board.  I generally show one example and then give students the opportunity to try other problems on their own.  (Until they wrestle with the math for themselves, they won't figure out what they will struggle with.)  But for other notes, students are not allowed to hold their pens/pencils while I talk

I have learned that most students do. not. listen. when they write.  I have had students write notes for 45 minutes while I talk, and at the end, they really have no comprehension of what they wrote.

So while I'm teaching, writing utensils are down.

For some topics, I give guided notes.  These go along with my PowerPoints and have questions after every few slides.
Students listen while I teach a particular concept, they answer a few Check for Understanding questions out loud, they ask questions of their own, we discuss what they're learning, and then they pick up their pencils to answer the question on their notes.

We then move on to the next topic, pencils down again.  The full PowerPoints are available on my class website, (so if students need to go home and look at them again they can), but in-class time is better spent processing the material for themselves rather than almost mindlessly copying words from the board.


Some students feel like there's some magic to the way that I phrase things.  For example, a student asks a question, and I ask the class to answer.  Another student gives a great answer.  We move on.  But, the first student asks, "Yes, but what would you say?"  (As if my words mean more than his or her classmates' words.)  

Other times, students will be hesitant to write their own words down in their guided notes as an answer to the question.  They want to copy directly what the slide says or what I say.  From the very beginning of the year, I try to push them past this misconception and help them to build confidence in their OWN words.  I focus on understanding the concept, not memorizing the words.  I never have questions or answer choices on a test that exactly mimic the notes on the board.  I want students to focus on being able to answer a question in their own words, and feel confident in this.

For some topics, I have students create their own notes.  For example, for atomic structure, I have students make the foldable shown below.  


My PowerPoint is organized into three parts -- Atomic Structure, Isotopes, and Ions.  While I explain each topic, students have their pens/pencils down.  After I explain Atomic Structure and guide the students through questions and practice and examples, I have them open up to the first section of their foldable and work together with the students around them to organize what they have learned in whatever way they choose.  As they discuss in groups, and ask me questions, they write down what they have learned in their own words. (This helps each student to see many different perspectives on the topic and if someone was unsure about something this is usually when the 💡 shines above their head.)

Examples of student-organized notes:

When they are done discussing in groups, we then go through the PowerPoint about isotopes. 
We repeat the process again: 
I teach, we discuss, students ask questions, I give examples, I ask questions, 
(all while students have their pens/pencils down).  
Then they get into groups again to organize their notes and thoughts.


The first time you do this, many students will struggle or be reluctant.  Teaching students to write their own notes requires scaffolding and support.  I have on the PowerPoint a list of words/concepts/topics we just covered to jog their memories and guide their group conversations.  I am available to answer questions while they are writing their notes.  This is important -- they are not taking a test, they are writing notes, and it's important for them to be accurate.

I love hearing the discussions between students while they are writing their notes.  The retention of information is so much higher when they are forced to think back to the lesson while they write their notes.

Again, students know that they can go home and look at the PowerPoints more if they need to, but in-class time is spent allowing them to come to their own understandings of the material.


Student-Owned Homework

I do not assign "homework."  I give my students opportunities to practice a new skill in class (usually with either a worksheet or a game).  When class is over, they have the option of finishing the worksheet at home, or if the practice was a game, there's an optional worksheet they can pick up.  It is their decision.  I try to instill in them from day one that homework is practice for them.  If they need extra practice, then they should do it or they will struggle on the quizzes.  

I post answers online so that they can check as they go and recognize mistakes immediately.  I generally let students know the day of the lesson when the quiz on that skill will be (usually a few days later).  This allows students who do not understand right away a few days to spend time practicing before the quiz, and does not penalize students who take a little extra time to learn something.

Students who understand the concept/skill during the in-class practice time do not need to spend time at home practicing unless they choose to.  At home practice is for them, not for me.

Student-Centered Lessons

There are some topics that require me to lecture.  There is no other good way for students to efficiently learn the material.  But there are some topics that, if guided well enough, students can learn at their own pace.

For these topics, I have guided lessons and activities.  These are activities that have the notes embedded and give students active practice with the topics instead of just learning fact after fact after fact.

I allow students to work at their own pace, within reason, and check with me after every page.  This "checking" allows me to quickly point out errors and have 1 on 1 discussions with individual students or pairs of students about their errors and misconceptions.  As students are coming up to me individually, it turns what could have been a whole-class lesson into short private tutoring lessons, one topic at a time.

Students who generally fade into the background and don't ask questions in class, but instead fall further and further behind, are forced to show me their work in a safe, private environment, throughout class.  I have practice worksheets or extension activities available for students who finish early, allowing the students who need more processing time the chance to do so.  Combining the lesson with the lab activity gives students hands-on, immediate practice with the concept, instead of it being abstract and theoretical.


Here are three examples of student-centered and self-paced lessons embedded with activities:
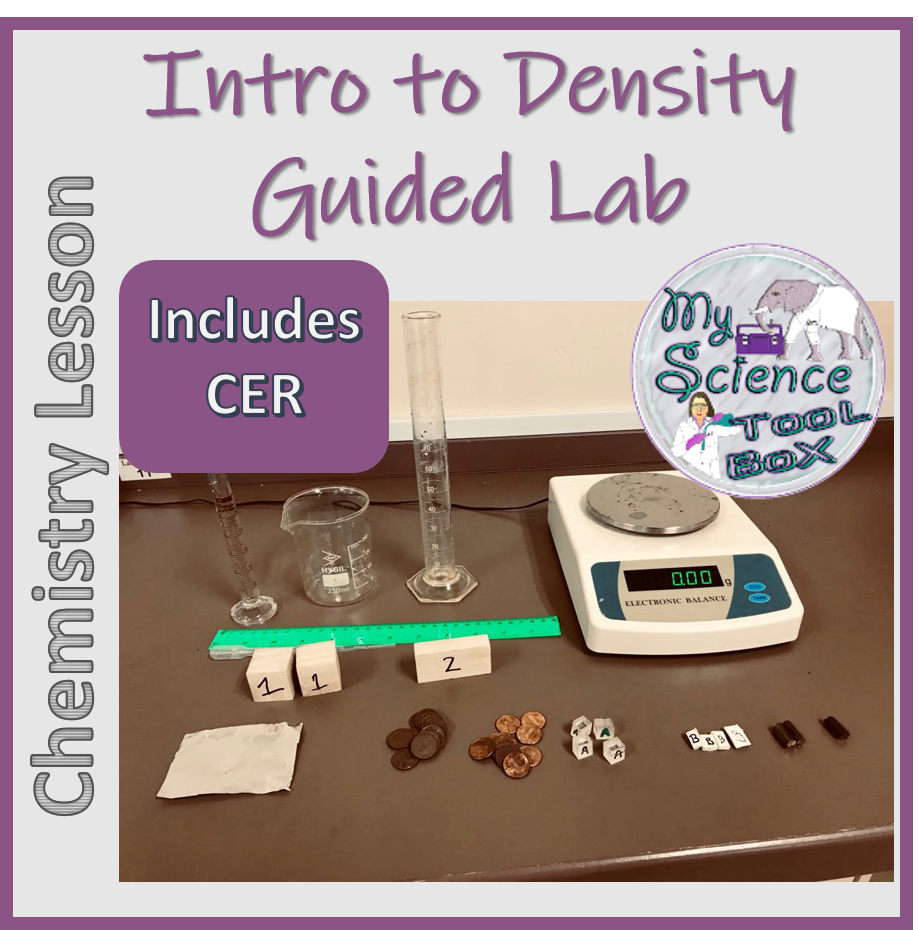
Density Guided Lab
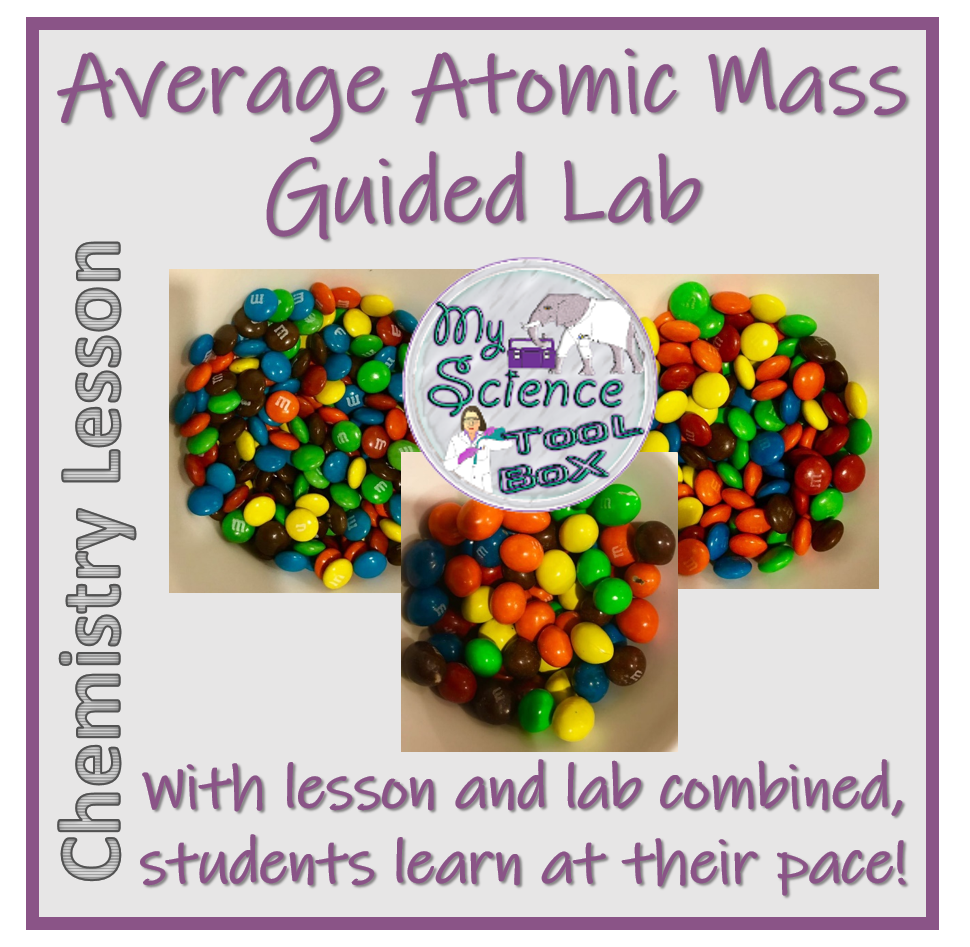
Average Atomic Mass
Guided Lab

The Take Away

As teachers, we all know that everything we do in class is to try to help students learn.  Many students do not realize just what that means, and treat everything they do in class as a "favor" for their teacher.  In order to maximize learning, it is important that students recognize that they are working for themselves.  The best way to do this is to build a classroom culture that gives the responsibility of learning to the students at every step, from lessons to notes to practice.

Happy teaching!

Saturday, August 24, 2019

AP Chemistry Escape Room

Can YOU Escape Without a Calculator?!

There is nothing like the stunned silence on the first day of AP Chemistry after I announce: "There are no calculators allowed on the multiple choice of the AP exam.  Therefore, I will not allow calculators on the multiple choice portions of our tests this year."
The gasps!  The shock!  The PANIC!  

My first unit is Stoichiometry and Solutions, and it is basically the same concepts they learned last year, but applying them to AP-type scenarios.  It is a huge leap for them to go from doing each problem the same way as the last, as they did in 10th grade chemistry, to being able to read a new scenario and decide how to go about answering it.  None of the calculations we do in this unit are new to them, but the process and problem solving skills are new.  We spend the first few weeks in the lab and working problems.

With their first unit test approaching, we have been working hard on problem solving skills, stoichiometry, and particle diagrams.  But we had not yet addressed the elephant in the room.  No calculator?  On math problems?  

I wanted their first introduction to this calculator-free multiple choice to be less stressful than a test situation.  A friend of mine gave me the idea to turn it into an Escape Room, and although the final product was quite different than my original vision, I thought it was a huge success in my classroom and wanted to share it.

My students have 1:1 computers, so I decided to do a digital escape room (with a few non-digital components).  I described my vision to technology integration specialist and asked if there was any way to do it.  She suggested I use Google Forms and she set up the template that I then adapted and turned into my escape room.  

How It Works

Students are paired in groups of 3-4.  As this is their first introduction to Chemistry Without Calculators, I wanted them in groups that would allow collaboration.  I let them choose their own groups, but you could assign them if needed.  Each group needs one computer.

I went over the directions with the class (see the instructions that follow) to make sure they understood each step.  I reminded them that without calculators, many of the numbers in the AP exam will be mental math friendly, and to change decimals to fractions to make the math a little simpler.

I sent them the link to the Escape Room.  The first page asks them to type in their name.  I had them list all their names.  (When each group had entered that and was ready, I told them to begin.)

The first screen asks a question.  They must solve it and enter the correct answer.  If the answer is wrong, it tells them to try again.

(I have set up the Google form to accept the answer without units, and if significant figures are important in a particular question, it tells them how to round their answer.)

Students must keep trying until they get the correct answer, at which point the second question appears.


Students continue until they have correctly answered 4 questions.  At this point, the Google Form gives them a clue about an element.
In the back of the classroom are envelopes labeled with element symbols: 


The students choose the correct folder, based on the clue they are given, and pull out a puzzle piece:

They go back to their seat with the puzzle piece and continue answering questions.  After another 4 questions, they get another clue, and go back to find another puzzle piece.  


There are 16 total questions, for a total of 4 puzzle pieces:


Once they have collected all the puzzle pieces, they put them together to see the final question:

Then, they answer the question, type their answer in the Google Form, and they have ESCAPED!!!


The Details

This particular version took us two 45 minute class periods - this takes a bit of time for them to wrestle with, especially if this is their first time wrestling with how to solve these types of problems.  

I am sharing the files and would love for other teachers to give it a try.   (These questions are not original --  I have taken them from various practice problems I have found to help my students prepare.)

Advance Preparation

Everything you need is in this file:  AP Chemistry Escape Room

Print out the puzzles -- 1 per group.  Cut them out and put all of the same pieces in the same envelope.  I laminated them so that they would last longer.  I put one set of pieces in the "H," one in the "C," one in the "Zn," and one in the "F."  If you wanted to change the envelopes, you could just change the clues within the Google Form.

I had a bunch of "dummy envelopes" so they had to decide which envelope to draw from.  At first those were empty, but then I felt students would just shake them to figure out which envelopes had something in them, so I put scrap pieces of paper in all the dummy envelopes. 😆

If you don't have computers for the students to use, you could easily adapt this:
Just print out the questions and put them in numbered envelopes.  Give each group an envelope with #1.  Have them check answers with you and when they get #1 correct, give them #2.  This is a little more work for you during the class, but it would be one way to adapt it.

The Take-Away

This was really fun for my students, and it was a great way to throw them in the deep end with non-calculator questions.  😉

Creating the template and figuring out how I wanted this to work was fairly time consuming, but now that the template is done it would be quite easy to use this for other units and/or classes.  My students really enjoyed it and after a few questions they started getting the hang of how to handle questions WITHOUT a calculator!

Happy Chemistry students
who have just "Escaped"!

I let my students choose their own groups, and I ended up with several groups of mixed abililty, several groups with three high achievers, and several groups with three students who struggle a little more.  I was very surprised that all groups seemed to perform similarly.  Learning this skill was difficult for all of them, and some of the students who struggled seemed to get more confident when they saw that they got a puzzle piece before a group of "high achievers".

Now that I have the template, I can see doing this more often for this class and for others. If you give it a try, please share your experiences!

Happy gaming!